Friday, April 28, 2006

How to Wok the Wok


Recently I acquired a beautfiul new cookbook, The Breath of a Wok by Grace Young and Alan Richardson. Its gorgeous photography and innovative-yet-familiar recipes are supplemented by several chapters about the history of woks, Chinese wok culture, purchasing a wok, seasoning a wok, what woks are made of, and, most importantly, a concept in Chinese cooking called wok hay (or wok hei; it's the phonetic translation of the Northern Chinese pronunciation of the word that means chi, or life-energy). When food is cooked in a very hot, well-seasoned wok, the wok imparts a texture and flavor to the food that lingers for only minutes after preparation. This is wok hay.

Since reading The Breath of a Wok (cover to cover, as I usually nerdily read cookbooks), I have been obsessed with acquiring a wok and acheiving wok hay on my own.

I do have a wok already - but it's a teflon-coated, slightly rusty nonstick wok that Grace and Alan ubiquitously condemned in the first chapter. So I planned a wok-hunting trip to Chinatown with these criteria in mind:

Woks are either made of cast iron or carbon steel (each preferred in a different part of China). Cast iron woks are thick and heavy. This makes them very sturdy and resilient; they also get very hot and stay hot for a long time after removed from heat. However, the weight makes them harder for an unpracticed novice with no upper-body strength like myself to maneuver, particularly when tossing the contents of the wok (called pao - I will learn to do this). Carbon steel woks are lighter because the metal is beaten very thin; this makes them easy to handle but also more fragile (i.e., a carbon steel wok will shatter if it gets smacked against a counter or dropped). They also don't retain heat as well; in a Chinese fire pit or wok stove this is less relevant because of the extrememly high temperatures, but on a western gas stove, heat retention becomes paramount.

To flat-bottom or not? I, of course, am enamoured with the idea of having a wok that's just like the ones the Chinese were using two thousand years ago - a wok with a rounded bottom. Unfortunately, not only do they fail to perch steadily on a western stove, they don't absorb heat as evenly or efficiently as a flat-bottomed wok.

Handles: Northern Chinese woks typically have a long handle, excellent for pao; Southern Chinese woks have two steel grips on either side of the wok, which require less strength but more caution (you can easily burn your hands!). The most recent innovation is a long pao handle on one side and a grip on the other. Also, ought there be wood or rubber coating on the handles? On the one hand, they make the wok infinitely easier to...well...handle (and you don't have to deal with potholders); on the other, handle coverings rule out the possiblity of seasoning your wok in the oven.

Size: woks come in many sizes, from a foot across to more than three. The average American gas stove can accomodate a 17-inch wok or smaller.

As it happened, my Chinatown adventure became moot: I was walking to rehearsal for my show that's running right now, and I passed a pile of stuff on the street that looked like apartment discards...and right on top was a wok. Two moving men stumbled out a nearby doorway and contributed a bookshelf to the pile; a girl leaned out an upstairs window and explained that she was moving and I could have whatever I wanted.

If this strikes you as a little ghetto...you've obviously never lived in Lower Manhattan. Everybody furnishes their apartments from sidewalk finds; it's common practice. And hello, it's recycling!

I took the wok. It was cast-iron with a long wooden pao handle, and though somewhat used and a little sticky (a la cat hair), it was in decent shape, not rusty at all. No patina had been developed, which meant that the girl probably didn't know that you're not supposed to wash a wok with soap and water after using.

I bought some steel wool on the way home and gave it a good scrubbing, inside and out. I washed it throughly with hot water and detergent for perhaps the last time in its wok life. Then I gave it its first ceremonial seasoning by rubbing the inside of the wok with chives (to get rid of the metal taste) and frying pork fat in it.


According to Breath of a Wok, a new wok has to be throughly seasoned before cooking foods that might stick. I, therefore, have been seasoning my wok by swirling cold oil in the hot wok every couple of days and stir-frying simple combinations of onions, garlic and ginger. To clean the wok, I just pour off the excess oil, swirl a little water in the wok with a wok brush, and dry it by heating it up again over a high flame.

Which all brings me to my first real use of the wok; my first attempt at wok hay.

It was a very simple saute; I didn't want to disrupt the newly-forming patina on my gleaming wok. I heated the pan, swirled a little peanut oil and sesame oil up the sides of it. I squeezed in a splash of giner juice, a pinch of red pepper. I tossed in a crisp, brilliant green handful of broccolini.

The wok hissed and sizzled wonderfully. I pao-ed with finesse, tossing my broccolini gently in the air. after about thirty seconds, I added in a splash of soy sauce, which turned instantly to fragrant steam and billowed above the wok. Another thirty seconds passed, the broccolini glowed green, and I scooped it into a bowl. Hurriedly I swished water in the hot wok, anxious to try my broccolini...to see if I had done it...steam rose off the bowl; the glistening stalk trembled in my chopsticks. I crunched down.

I did it. I DID IT! WOK HAY! The brocollini was hot and crunchy, the perfect texture; all the flavors my wok had absorbed shone through (there's the pork fat! And the garlic! And the chives!). I couldn't wait to eat the rest of it before the wok hay went away AND THEN THE BUZZER RANG!!! AAAAAAAHHH NOOOOOOOO NOT THE UPS GUY!!!!

I went down four flights of stairs, signed for a package, jogged back up, returned to my broccolini slightly out of breath...

...but the wok hay was gone.

Friday, April 21, 2006

Herbal Update #2:


Cucumbers! Helloooo!!! Aren't they so so adorable?

Thursday, April 20, 2006

Easter Herbs Update:


The arugula is first to poke out its (many!) pretty little heads.

To you gardeners: how long should I wait before thinning them out? Before or after transplanting?

Tuesday, April 18, 2006

Eggspanding, Organegg Eggstravaganza


Check this: I found an Easter activity that a) appeased my inner (and outer, named J) environmentalist; b) rightly celebrated the colorful fertility of spring; c) was appropriately eggy; and d) was ultimately delicious!

Follow along with the pictorial essay of our eggventure...

Part I: We Crack a Dozen Eggs

In point of fact, it was a baker’s dozen. We cracked them by tapping the skinny ends of them against the floor (where we were sitting, and working on newspaper) until little cracks formed; then we gently chipped away at the hole until the top quarter of the eggshell was gone. They looked like little birds had wriggled their way out! We poured the insides out, separating whites and yolks and putting them in separate bowls, which we refrigerated.

Part II: We Concoct Natural Dyes


How cool is that?! We made red dye out of beets,


Blue out of blueberries (we used fresh, but apparently canned blueberries work too),


And brown out of instant coffee (although I’m sure regular coffee grounds would have had the same effect; for maximum recycling, the best would be used coffee grounds—but we’re not coffee drinkers, so we didn’t have any). (Green can be made out of spinach, but I didn’t have that either.)


We added enough water to the ingredients to cover the eggs, added a teaspoon of white vinegar to each, and brought them to a boil. Then we removed the pots from heat and added the eggs. We let them steep for about an hour while:

Part III: We Make a Soufflé


My first soufflé, ladies and gentlemen. I didn’t have a soufflé dish, and after sending J out on an unsuccessful venture to acquire one, I gave into my own disreputable creativity and built one out of a small stewpot and aluminum foil. It worked quite well! The perfect Easter food: we used the separated yolks and whites from our eggs to make the soufflé.

GRUYERE AND PARMESAN CHEESE SOUFFLE

INGREDIENTS

Grated Parmesan cheese
1/4 cup (1/2 stick) butter
5 tablespoons unbleached all purpose flour
Pinch of cayenne pepper
Pinch of ground nutmeg
1 1/4 cups whole milk
1/4 cup dry white wine
6 large egg yolks
1 teaspoon salt
1/4 teaspoon ground black pepper
1 1/4 cups plus 2 tablespoons (packed) coarsely grated Gruyère cheese (about 6 ounces)
1/4 cup finely grated Parmesan cheese
8 large egg whites


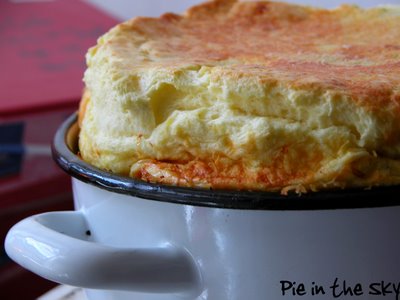
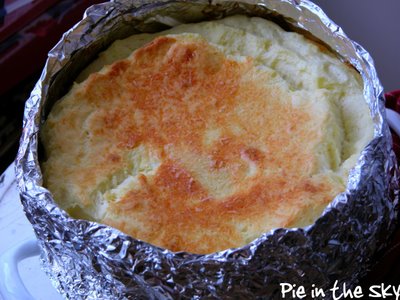
(Fallen soufflé, an hour after baking)
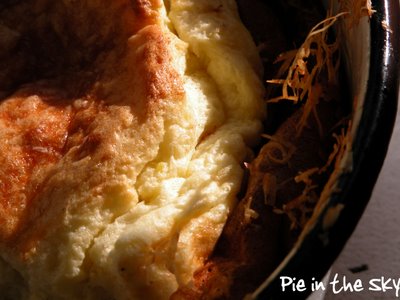
DIRECTIONS

Position rack in center of oven and preheat to 400°F.

Generously butter one 10-cup soufflé dish or six 1 1/4-cup soufflé dishes; sprinkle with Parmesan cheese to coat. (If using 1 1/4-cup dishes, place all 6 on rimmed baking sheet.)

Melt butter in heavy large saucepan over medium heat. Add flour, cayenne pepper and nutmeg. Cook without browning until mixture begins to bubble, whisking constantly, about 1 minute. Gradually whisk in milk, then wine. Cook until smooth, thick and beginning to boil, whisking constantly, about 2 minutes. Remove from heat.

Mix yolks, salt and pepper in small bowl. Add yolk mixture all at once to sauce and whisk quickly to blend. Fold in 1 1/4 cups Gruyère cheese and 1/4 cup Parmesan cheese (cheeses do not need to melt).

Using electric mixer, beat whites in large bowl until stiff but not dry. Fold 1/4 of whites into lukewarm soufflé base to lighten. Fold in remaining whites. Transfer soufflé mixture to prepared dish. Sprinkle with remaining 2 tablespoons Gruyère cheese.

Place soufflé in oven; reduce heat to 375°F. Bake soufflé until puffed, golden and gently set in center, about 40 minutes for large soufflé (or 25 minutes for small soufflés). Using oven mitts, transfer soufflé to platter and serve immediately.

(Recipe courtesy of Epicurious.com)

We prepared the soufflé exactly as directed and it was a smashing success. The cayenne and nutmeg are clever additions that add a lot of flavor and experience to the dish. The soufflé rose into but did not exceed the limits of my aluminum makeshift dish; nor did it spill!

I whipped up some whole wheat pancakes and topped them with fresh strawberries, pure maple syrup, and mascarpone cream; we ate them with the soufflé.

WHOLE WHEAT PANCAKES

INGREDIENTS

1 ½ cups whole wheat flour
½ cup unbleached all-purpose flour
1 teaspoon sea salt
2 tablespoons baking powder
1 ½ cups of milk
2 eggs, well beaten
2 tablespoons canola oil

DIRECTIONS

Combine all ingredients and mix well. Heat two additional teaspoons oil on griddle or heavy skillet over medium heat; pour batter into pancakes of desired size, tilting pan to spread batter around. When batter begins to bubble, flip pancake; cook one more minute. Transfer to plate, garnish with mascarpone cream and syrup, and serve hot.

SWEET MASCARPONE CREAM

INGREDIENTS

6 oz. mascarpone cheese
¼ cup heavy cream
¼ cup 10x powdered sugar
½ teaspoon vanilla

DIRECTIONS

Blend all ingredients with an electric mixer for 2 minutes or until thick and fluffy.

Part IV: Back to the Eggs

We removed the nicely dyed eggs and allowed them to dry. The beet (it was just one big beet) was the least potent of the dyes; it just left the eggs a little pink and spotty.


The blueberries, on the other hand, were a great success, and the coffee eggs were lovely. Look at them all together!


For the final part of our project, we went out to the park to soak up some sun and music.

Part V: Potting

We filled each egg with organic potting soil, then planted herbs and veggies in each of them. Our egg-pots contain oregano, lavender, arugula, sage, cucumbers, and parsley!


Tips:

Placing a ball of cotton in the bottom of each egg will help soak up excess water and prevent molding.
When the plants begin to outgrow their pots, just crack the eggs and drop them in a bigger pot, shells and all—the nutrients in egg shells are good for plants, and the shells help aerate the soil.

Further updates to come when the little guys begin to sprout!

Wednesday, April 12, 2006

Exposed Brick


By way of apologizing for my less-frequent posting recently - a trend which promises to continue for the next two weeks - let me tell you about what I'm up to, and invite you to MY SHOW!

You are invited to
EXPOSED BRICK
Wednesday 4/26 @ 3:30 pm
Thursday 4/27 @ 3:30 pm
Friday 4/28 @ 3:30 pm
Saturday 4/29 @ 11 am and 2:30 pm
Starting location:
St. Augustine’s Church, 290 Henry Street

RESERVATIONS REQUIRED
(212) 992-8244
Wear your walking shoes!
RAIN OR SHINE
ADMISSION FREE
***
A traveling performance in the Lower East Side, Exposed Brick is a production of the
Grassroots Performance Project,
Department of Drama, Tisch School of the Arts, NYU.

Written and Performed by

Lindsay Allen, Samantha Brahms, Charlotte Campbell, Christiamilda Correa,
Kate (me!), Jamie Haft, Joanna Hefty, Lagina Hill, Andrew Larimer, Nadia Szold, Gregory Manley, Eugene Michael Santiago, Liz Sharts, Zack Tinkelman, Sarah Townsend

Direction by

ROSEMARY QUINN
JAWOLE WILLA JO ZOLLAR
JONATHAN HART MAKWAIA
JAN COHEN-CRUZ

Directions to St. Augustine’s: “F” train to East Broadway. Exit onto Madison St. Walk in opposite direction of the Manhattan Bridge four blocks to Montgomery St. Turn left. Walk one block to Henry Street. Turn right. Church is halfway down block on right.

The performance ends at the Lower East Side Tenement Theatre, 97 Orchard Street.

This entire semester has been devoted to researching, experiencing, and performing the history, culture, and community of Manhattan's Lower East Side. NYU has a particularly complicated relationship with this neighborhood because of the amount of real estate it owns and continues to buy, and the constant influx of students that contribute to gentrification of the area. We've studied the history of the island and of immigration; we've conducted interviews with local restauranteurs, residents, community-outreach people, NYU reps; we've written vignettes and maybe even learned to sing and dance. The project is culminating in aforelisted SHOW, which goes up at the end of the month. It's quite exciting, and a kind of theatre that, chances are, you've never experienced. If you're in the New York area and are interested in coming, just call and reserve a FREE ticket!


Anyway, it's all very exciting. And rehearsals are consuming the hours between noon and midnight every day until May. So if my posting gets a little sparse, please don't feel that I'm losing interest...as it happens, I've got several exciting posts waiting in the wings! I promise to get around to them whenever I can.


In the meantime, please feel free to peruse the Grassroots Performance Project Blog, which documents parts of our research and process with pictures and text. You can learn lots of insdie info about the LES...


Thank you for your patience and understanding. Keep visiting for updates!

Saturday, April 08, 2006

O'Naturals

Spicy udon noodles with snow peas, zucchini and carrots; a crunchy organic salad with apples...but Kate, that isn't your dishware! Where did this picture come from? Who made this yummy-looking lunch?

Why, O'Naturals, ladies and gents. The new organic fast food chain.

Here's what treehugger.com had to say about the new, fast-growing quick stop:

As the first organic fast-food restaurant, O’Natural’s has a pretty simple concept: Provide people with food that’s 100% food. With four locations (two in Massachusetts and two in Maine) the business is growing quite quickly and one quick look at the menu explains why. It’s comprised of Flatbread Sandwiches, salads, soups, Asian noodles and assorted breakfast items as well. Pizza is served after 4pm and a kid’s menu is also available. Clearly, the Flatbread Sandwiches are a favorite on the menu as the selection is quite distinct. Anything from a Chicken TMB (free roaming chicken breast meat with balsamic vinaigrette, tomatoes mozzarella and basil) to a Wild West (wild prairie raised bison meatloaf, roasted red peppers, cheddar and mustard) to a Mediterranean (organic hummus, lettuce, red onion, roasted red peppers and Swiss) can be found here. The café is designed to be a quick stop for people in a hurry, but the leather couches and pleasant atmosphere might make you want to stay. The people behind this great idea are Gary Hirshberg, President and CEO of the successful Stonyfield Farm, Pam Solo, President of the Institute for Civil Society (ICS) and Mac McCabe, Consultant to ICS. Here’s food for thought - they are now offering franchising options (hmm…).

Wednesday, April 05, 2006

Buttermilk Cupcakes


I found a scrumptious cupcake recipe yesterday!

Catalysts for said cupcakes were: a) a friend's birthday, and b) a persistently present carton of buttermilk in my fridge, taking up space and never quite passing its sell-by date, calling me wasteful and uncreative in its mocking little buttermilky voice every time I bypassed it.

It's been so long that I don't even remember what I bought it for. But I've tried to use it up twice, via two humungous batches of biscuits.

Ah, but today - today, with a birthday at hand - that buttermilk was going down.


BUTTERMILK CUPCAKES

INGREDIENTS

twenty-four 2 1/2-inch paper muffin cup liners
4 cups cake flour (not self-rising)
2 teaspoons baking powder
2 teaspoons baking soda
1 1/2 teaspoons salt
2 sticks (1 cup) unsalted butter, softened
2 cups sugar
2 teaspoons vanilla
4 large eggs
2 cups well-shaken buttermilk (two cups! Muahahahaha)

DIRECTIONS

Preheat oven to 350°F. Line 1/2-cup muffin cups with paper liners.

Into a medium bowl sift together flour, baking powder, baking soda, and salt.

In a large bowl with an electric mixer beat together butter and sugar until light and fluffy; beat in vanilla.

Add eggs 1 at a time, beating well after each addition; with mixer on low speed beat in buttermilk until just combined.

Add flour mixture in 3 batches, beating until just combined after each addition.

Spoon batter into lined muffin cups, making each slightly less than half full. Bake in upper and lower thirds of oven, switching position of muffin trays halfway through baking, about 15 minutes, or until golden and a tester comes out clean. Cool cupcakes on racks 5 minutes and remove cupcakes from cups. Cupcakes keep in an airtight container at room temperature 2 days. Makes about 40 cupcakes.

(Recipes adapted from epicurious.com)

The only real adaptation I've made to this recipe is the amount of batter in the cups and thus the cook time. The original recipe said to fill the cups, but filled cups, I found, overflow distasterously. With paper liners, you don't even want the side of the cake to rise above the edge of the paper, because then they're hard to remove. Also, if the top overflows onto the flat of the pan, that part gets dry and crusty. Bottom line: the springy, airy texture of the cake was lovely, so I didn't want to adjust the amount of baking soda/baking powder - so just be sure not to fill them too full, or you'll have dry cakes and burnt batter on the bottom of your oven.

I made two different cream cheese frostings for the cupcakes, as per the original recipe, but I found the lemon to be in all respects superior, os I'm only giving you that one (if you're dying for chocolate, I'll bet bakingsheet has a killer chocolate frosting recipe somewhere what doesn't involve cream cheese).

LEMON CREAM CHEESE FROSTING

INGREDIENTS

1 (8 ounce) package cream cheese, softened
1/4 cup butter, softened
2 tablespoons lemon juice
2 teaspoons lemon zest
1 teaspoon vanilla extract
4 cups confectioners' sugar

DIRECTIONS

Beat cream cheese, butter, lemon juice, lemon rind, and vanilla together until smooth and fluffy. Add confectioners' sugar in 2 additions. Beat until creamy.

Spread generously over domes of cupcakes (or squeeze through a pretty little squeezy-thing, if you have that). Garnish with a twist of lemon zest.

(Recipe adapted from allrecipes.com)

This was DIVINE and makes plenty, even for forty cupcakes. It's one of those things like lemon curd that I could just eat guiltily with a spoon. In fact, seeing as how I only used half of it (because I also made the chocolate frosting), I know what I'll be doing with the lemon leftovers!

PS. Here's what it was doing in New York this morning: (???!!!)


Closing comment: shoutout to PostPunkKitchen and her amazing cupcake series.

Tuesday, April 04, 2006

Southern Fried Catfish


Here's a yummy, college-student-friendly, homecooked meal that you can a) pay for with the money you found in your couch, and b) cook for two in less than ten minutes: Fried Catfish, wild rice and a handful of sweet, crunchy sugar-snap peas.

Now, right now you're probably wondering whether I'm aware that people don't really fry fish anymore (for health reasons). Yes, I am! But here are three reasons you should "fry this out" (wink, wink) anyway:

a) Fish 'n chips are back. They're the new thing. There are at least four fish 'n chips places in Manhattan's Lower East Side alone! So by making fried fish at home, you're avoiding the chips and the deep fryer and being excessively hip.

b) There's actually very little grease in this recipe - just two tablespoons or so of a heart-healthy oil like canola, or even olive oil. And most of that gets poured off.

c) Fried fish is extremely easy to season (i.e., salt and pepper) - so it doesn't take expensive fresh herbs, an elaborate spice rack, or epicurean know-how to make it delicious.

FRIED CATFISH IN TEN MINUTES (for two)

INGREDIENTS

2 catfish filets ($2.43 fresh at Associated Supermarket)
1/2 cup cornmeal ($ .40 at Commodities Natural Market in bulk organic, or $1.19 for 32 oz. at Associated)
1 tsp. salt
2 tbsp. canola oil
black pepper to taste

DIRECTIONS

On a plate, combine cornmeal, salt and pepper.

Rinse catfish and pat dry. Toss in cornmeal mixture, coating all sides.

Warm oil in a large pan over medium heat until hot but not smoking. Add breaded filets. Cook about 4 minutes on each side, or until inside is white and springy and outside is crispy. Transfer fish to paper towel, then to plate; pepper to taste and serve hot with ketchup on the side.


J and enjoyed our catfish this evening with wild rice (shh! from a box!) and raw, crunchy, wonderful sugar-snap peas. It was so good that when J's roomie came in and sampled our dinner, he ran out to the market for more fish!

Saturday, April 01, 2006

New Study Says Bacon is Good for You!


An article in the New York Times today brings to light a new study on the nutritious benefits of bacon. Have you ever been advised not to freeze bacon? That's because it contains a particular kind of insoluable fat that breaks down easily when frozen...or cooked! In fact, the study shows that this bacon "super-fat" not only resists absorbtion into the body - it also binds to other fats and keeps them from being absorbed as well! So never again ought we omit the bacon from our breakfast scramble - that bacon could be saving us egg calories! In fact, when shopping for bacon, it would be nutritionally advisable to avoid purchasing the leaner cuts.


The study advises readers that these fats are present in bacon cuts only - not the whole pig. So for you salami- and pork-chop-lovers, don't think these means you can up your consumption. But if you do continue to indulge in these non-bacon cuts - be sure to wrap them in bacon!


April Fools. Muahahaha.