Thursday, March 30, 2006

The Future of Food


It strikes me that many of my readers are Times-reading, green-market-shopping New Yorkers, or activist students, or self-proclaimed foodies, or food bloggers themselves. But when not in the haven of you hippie-foodie-blogger-activist-environmentalist-Slow-Food-yoga-types that constitute half of my readership, I’m in the company of the other half—those good, decent, no-nonsense Southern folk who wouldn’t be caught dead asking a Piggly-Wiggly employee where the organic section is. Boy, can they cook!...but when discussing issues like the genetic engineering of food, the dangers of pesticide use, monoculture cropping, or buying local vs. imported produce with them, I seldom get more response than a placatory “well you young people just know so much these days” or “it must be nice to have the time and money to think about things like that.” Even worse, young greenies like me get derided as paranoid conspiracy theorists—the logic is that if the generation before mine survived the inauguration of chemical pesticides, etc. (not the least of which was DDT), what have I to fear from my food?

Quite a lot, actually.

The Future of Food, a new documentary by Deborah Koons Garcia, elucidates the major food issues that ultimately affect us all…as well as the fact that as time passes, these issues expand and compile on younger generations.

The film focuses heavily on the effects of prolific genetically modified foods on people, biodiversity, and politics. Here’s how the GM (genetic modification) problem breaks down with regard to health, the politics of agriculture, and the environment:


Health:

Foods can be genetically modified to numerous ends—to make bigger bananas, longer-lasting apples, peaches resistant to bruising…even corn pre-infused with pesticides—on a genetic level! When Monsanto, the progenitor of the pesticide Roundup, started distributing seeds that are “Roundup Ready,” what that meant was that the seeds had been genetically altered to include the pesticide in their biological make-up. When an ear worm nibbled into an ear of corn, it died! If a person eats that ear of corn, they appear to be fine…but if they ate a spoonful of Roundup, they wouldn’t be.

The bottom line is that all of these genetic modifications have been pushed through the FDA without sufficient testing, particularly for long-term effects. No one really knows, yet, exactly what those effects will be, or how the redesigned genes will continue to recombine. Viruses and parasitic bacteria, and pieces of their DNA, are used to modify genes, and scientists are concerned that the recombined genes could become unstable and even contribute to human immunity to antibiotics.

It’s interesting to note that while GM foods have been connected to various cancers, immune suppression, allergies, asthma, and birth defects, they haven’t been modified in any ways that benefit the consumer. Like, tasting better, for instance. In fact, most GM foods have been proven to contain up to 70% less nutrients than conventional foods.

Politics:

Did you know that life can be patented? US law used to omit biotic life from patentable items; this was amended with the onset of GM foods. Now, a company can own all seeds with a specific permutation—and thus, all descendants of these seeds. Thus, when an organic canola farmer in Canada found that a Monsanto truck had spilled GM wheat seeds into his organic fields, he tried to sue them—but Monsanto sued back for property theft…and won.


With corporate super-giants like Monsanto distributing GM seeds worldwide for very little cost, it is cheaper for small farmers (American and otherwise) to buy them than to reserve and sow their own seed. In the US, even industrial farms are struggling, breaking even at the end of a season only after the government subsidies kick in. In fact, most members of the few agricultural families left in the US work outside jobs as well—and pay tax dollars that support subsidized GM farms that further burden farmers.

Most GM products have been banned in the UK; in most places, GM companies are required to label their foods “genetically modified.” In the US, this is not the case. Not only is GM produce unlabeled, but packaged products containing GM ingredients aren’t either—most sweet things that contain high-fructose corn syrup, for instance. Do we not, as Americans, have the right to know?


Environment:

The situation jeopardizes the biosphere, as well. There used to be hundreds of different kinds of potatoes grown and consumed in Europe and North America; now there are only four. Same goes for corn, wheat, tomatoes…you name it. Not only is this depletion of biodiversity just sad, it endangers all species that rely on food biodiversity—including humans. In parts of Africa, for instance, US agribusiness distributed GM rice seeds for almost no cost, and the rice was vitamin-enriched, faster-growing, and the stalks were taller—ostensibly a generous gesture. Farmers who had previously grown a dozen varieties of rice began growing only one, and after about five years of genetically modified plenty, their old stores of local rice weren’t cultivatable anymore. But then a big storm comes along, and all the tall stalks are ripped down. Normally, with a variety of kinds and heights of stalks, a disaster like this would only damage about 10% of their crop—but with the GM rice, they lose more that 75%. Alternatively, a particular insect, or a disease, could blight the GM crops, and instead of only losing a little, the farmers (and thus the communities that subsist on the produce of those farms) lose everything. People and animals starve.


(Deep breath) So. That’s a lot of information—and this is just about GM foods (to the exclusion of topics like pesticides, antibiotics, animal treatment, importation…) But what does it mean in terms of my mom going to the supermarket?

Buy local. The average item in the American shopping cart came 1,500 miles to get there. That’s a tremendous waste of energy! Conserve energy and support American and local farmers by buying locally-grown and produced food whenever possible. Greenmarkets and CSAs (Community Supported Agriculture) are popping up all over the country—see if there’s one near you!

Shop organic. What does organic mean? For a product to be organic-certified means no genetic modification, no hormones or antibiotics, no pesticides. Protect your health and that of your children.


Thanks for reading my diatribe and taking it seriously. For more information about the Future of Food, visit their website; to buy the DVD, visit Amazon. It’s also available on Netflix.

And for all you like-minded greenies out there—sorry for all the information that I omitted. These are vast, complex issues, and there’s a lot to be said about each of them. I welcome your comments and directions to other sources of information. Thanks!

Wednesday, March 29, 2006

For the Birds:

Quick update:

I'm now listed on the BlogFlux Directory, Chef's Blogs, and Technorati...you can link to them at the bottom of the archive panel on the right. You'll see that Technorati also sponsors a new feature on my blog: a search bar! So if you remember that great chicken 'n dumplings recipe and want to take a look at it, just run a search. You can also click to see what other blogs link to me.

More to come! Be back soon...

And a picture of one of my mourning doves on my fire escape, just for good measure. They've started roosting here sometimes.

Tuesday, March 28, 2006

Bacon: The Other Other White Meat


Let me start by saying that I’m not that into pork. I mean sure, every southern mom has a good pork roast recipe in her back pocket, and so did mine, but frankly, a big hunk of pork is frequently somewhat inferior to its cured cousins—bacon, sausage, salted ham, salami, prosciutto. Moreover, a pork loin is big…and I’m usually just cooking for two or three. So when I’m at the store and there’s already organic, thick-cut bacon in my basket (which there invariably is; J’s influence has made bacon a staple in my fridge), purchasing a pork roast is something I rarely consider.

Until the Tompkins Square Green Market this past Sunday. I was waiting in line to get my bacon, and a selection of pork roasts were displayed on the checkered table for the inspection of the customers ahead of me. They were beautiful cuts of meat—organic, local, free-range, and so fresh and colorful they could have been painted. So I got a small one, brought it home, split it, and froze half for later. (Hint: look for this half to turn up in a later post!)

Having no idea how to prepare a pork roast (and speculating that since it isn’t a regular part of The Boy’s diet, he might approach it with some skepticism), I searched for recipes what were exciting and palatable. When I was a kid, Mom made a sweet-and-sour-glazed pork loin that I have appetizing memories of, so I looked for recipes that combined sweet and tangy flavors. Lo and behold, I found just such a recipe, and for pork swathed in the ultimate ambassador to J’s palate:

BACON-WRAPPED MAPLE PORK LOIN

INGREDIENTS

For brining pork:

8 cups water
1/3 cup kosher salt
2 tablespoons maple syrup (Grade B or amber)
1/2 teaspoon crushed black peppercorns
2 sprigs fresh sage
1 large garlic clove, smashed
1 Turkish or 1/2 California bay leaf
1 (4- to 4 1/2-lb) boneless pork loin roast, trimmed

For roasting pork:

3 garlic cloves, finely chopped
2 tablespoons finely chopped fresh sage
3 tablespoons maple syrup (Grade B or amber)
16 bacon slices (about 1 lb)
1 tablespoon cider vinegar
1/2 teaspoon cornstarch
1 teaspoon water

DIRECTIONS:

Brine pork:

Combine all brining ingredients except pork loin in a 3- to 4-quart saucepan and heat over high heat, stirring, until salt is dissolved. Pour brine into a deep 4- to 5-quart pot; cool to room temperature, uncovered, about 2 hours.

Add pork to brine, making sure it is completely covered by brine, and marinate, covered and chilled, 8 to 24 hours.

Roast pork:

Put oven rack in middle position and preheat oven to 350°F.

Pat pork dry (discard brine) and remove any strings, then transfer to a roasting pan. Stir together garlic, sage, and 1 tablespoon syrup in a small bowl and rub all over pork. Lay bacon slices crosswise over loin, overlapping slightly, and tuck ends of bacon underneath loin.

Roast pork until thermometer registers 140°F (if you’re not in college and do have an instant-read thermometer), about 1 1/4 hours. Stir together 1 tablespoon syrup and vinegar until combined. Brush vinegar mixture over bacon slices and continue to roast pork until thermometer registers 150°F, about 10 minutes more. Remove from oven and let stand in pan 15 minutes. Transfer roast to a cutting board with a lip, reserving juices in pan, and let roast stand, uncovered, while making sauce.

Skim fat from pan juices and discard, then transfer jus to a small saucepan and bring to a simmer. Stir together cornstarch and water and whisk into jus. Simmer, stirring, until slightly thickened, about 1 minute. Remove from heat and stir in remaining tablespoon syrup. Serve pork with sauce.

(Recipe from Gourmet, courtesy of Epicurious.com)

NOTES FROM THE CHEF:

1. Brine is so cool! Wow. I brined for about 20 hours, and it definitely didn’t overpower the flavor of the meat.

2. The garlic-sage rub is delicious and imperative…I made one mistake here, which is that I didn’t think it sounded like enough maple, so I added some. Not necessary; this dish would have been plenty sweet and maple-y without it.

3. Even though my roast was more like two pounds, I still cooked it for a little more than an hour, just to make sure it was cooked through (because it was short but thick)…it probably didn’t need that much time, but I brined it so long that it wasn’t going to dry out, and it came out perfectly.

RESULTS:

Beautiful presentation, delicious dish! Every single flavor was present—the maple, the bacon, the garlic, sage, and even bay leaves came out. The gravy/glaze with that cider vinegar tang is smashing. All in all, this required a little forethought with the brining, but was relatively easy and delectable.

I served it with sautéed broccoli rabe and roasted baby potatoes—a mix of little yukons, reds, fingerlings, and purples, which J cut into little nibble-sized pieces and I tossed with olive oil, bay leaves, oregano, fresh thyme, rosemary, and sea salt, and roasted alongside the pork loin for about forty minutes.

Monday, March 27, 2006

Perfect Postage


Today, J gifted me with a new book of stamps - the 2006 "Crops of the Americas" series, which feature chili peppers, beans, sunflowers, squashes, and maize. All of these are crops which had already been cultivated in North America for centuries before Columbus sailed the ocean blue.
To think I had almost gone to the deli for a roll of boring old flag stamps, when all along there was something out there really worth commemorating - food!

All Headline News brings us this fascinating tidbit: "It's the first taste of postal fame for corn, beans and squash. This is the third time sunflowers have appeared on a U.S. stamp. They were featured as the state flower of Kansas in 1982 and again in a set of wildflower stamps in 1992. Chili peppers appeared in a wreath in the 1998 Christmas stamps."

Steve Buchanan of Winstead, CT illustrated the stamps based on photographic slides taken by his wife, Rita Buchanan.

Sunday, March 26, 2006

Empanada Extravaganza!


To me, empanadas seem like the perfect food. They’re small, tidy, and easy to make; they’re good hot or cold; they’re infinitely variable, so you never get tired of them; they’re good for any course of any meal of the day; they can contain any combination of food groups (vegetables, meat, cheese, fruit, chocolate); they can be inexpensive yet delicious; they’re a perfect solution for most leftovers. Leftover omelet? Chicken? Stir-fry? Put it in an empanada…eat it for lunch.

And thus it was that the long-awaited empanada party finally came to pass…last night, in all its supremely versatile deliciousness.

Pot-luck style, the party was structured thus: each attendee provides a filling of their own divining; dough wrappers would be provided. All the fillings were set out in a row on the counter with big spoons; each guest was given a lightly greased baking sheet and a stack of wrappers; and the Empanada Free-For-All commenced.

Basic Instructions for Making an Empanada:

Preheat oven to 425 degrees.

Warm disc of dough between hands until pliable; spread gently with palms.

Place heaping tablespoon (or more!) of filling in center of dough.

Fold dough in half; fold bottom lip up over top lip. Crimp closed with tines of a fork. (Empanadas can be prepared up to this point 1 day in advance.)

Arrange empanadas on dampened nonstick baking sheet. Prick top of each pastry several times with fork (for steam vents). Brush tops with egg wash (1 egg white whisked with 1 teaspoon water); dust with salt (or sugar, depending on filling).

Bake for 8-12 minutes or until edges begin to brown. Serve immediately—but be careful, the filling will be hot!


Empanadas can, of course, also be deep fried, but we stuck with baking due to the pot-luck nature of the party (and our personal health).

A note on empanada dough: We used Goya flour wrappers because that’s what was available at our local grocery. Goya also makes cornmeal-based wrappers, which are better for frying. Alternatively, you can make the dough yourself. If you live in the East Village, Ruben’s Empanadas will give you a stack of 18 regular or whole wheat wrappers for $5.00, if you order them two days in advance.

At the party:

Bacon, Leek and Cheese Empanadas
Banana Black Bean Empanadas
Cilantro-Cayenne Shrimp Empanadas
Granada Turkey Empanadas
Strawberry Empanadas

Rice and Beans
Nopales (Cactus) Salad with Spicy Dressing


BACON, EGG, LEEK AND CHEESE FILLING

INGREDIENTS

½ pound thick-cut bacon, fried and shredded
3/4 cup chopped well-rinsed white and pale green part of leek
1 tablespoon plus 1 teaspoon canola oil
3 tablespoons water
2 eggs
2 tablespoons grated Manchego, Jack, or mild white Cheddar cheese

In a small heavy skillet cook leek in 1 tablespoon oil over moderate heat, stirring, until leek is softened. Add water and cook, covered, over low heat until leek is soft, about 8 minutes. Pour off any excess water. Remove skillet from heat, toss with bacon, and add salt and pepper to taste. Scramble eggs in remaining teaspoon of oil; remove from pan and toss with bacon mixture. Let filling cool completely and stir in cheese.


BANANA BLACK BEAN FILLING

INGREDIENTS

2 tablespoons vegetable oil
2 firm medium-size bananas, diced
3/4 cup chopped onion
1 15-ounce can black beans, rinsed and drained
1/4 cup chopped fresh cilantro
1/4 teaspoon cayenne pepper

DIRECTIONS

Heat oil in heavy medium skillet over high heat. Add banana and sauté until golden, about 1 ½ minutes. Using slotted spoon, transfer banana to paper towels to drain. Add onion to skillet; sauté 3 minutes. Add beans, cilantro, and cayenne; cook until mixture is hot, about 3 minutes. Mash bean filling to coarse paste; fold in bananas. Season with salt.

(Recipe adapted from Bon Appetit, courtesy of Epicurious.com)


CILANTRO-CAYENNE SHRIMP FILLING

INGREDIENTS

½ pound cooked shrimp, peeled and quartered
1 tablespoon olive oil
2 teaspoons finely minced garlic cloves
2 generous dashes cayenne pepper
¼ cup chopped cilantro
¾ cup grated Jack or Queso Quesadilla cheese

DIRECTIONS

In a small heavy skillet sear shrimp in garlic and olive oil over medium heat.

Remove skillet from heat and add cayenne pepper, coating shrimp evenly.

Let shrimp mixture cool completely while combining grated cheese and chopped cilantro. When cool, combine cheese and shrimp mixtures.


The Granada Turkey filling was provided by Glod, so I don’t have the recipe, but it was a delicious combination of ground turkey, fresh tomatoes, onions and wonderful spices. Alexis brought the fabulous rice and beans.

The Strawberry Empanadas were a dessert-y afterthought: I just put chopped strawberries, honey, a little sugar, and a small pat of butter inside the wrapper and dusted it with sugar. I made them again for breakfast this morning, but this time with an added spoonful of Nutella…mmm. Next time, I plan to try an apple-butter-cinnamon-brown sugar combination. Also appealing: strawberries, sugar and mascarpone!


The coincidence whereby I concluded upon concocting a cactus (nopales) salad: on the way to the market, I bought the new issue of Saveur, and the recipe was inside, along with a short article about nopales traditions in Mexico and South America. When I got to Essex Street Market, I found they had cactus for sale! I brought it to the register excitedly. The woman behind it regarded me skeptically.

“You know this?” she asks, holding up the cactus.
“Oh, yes,” I say with false confidence.
“Yeah? You know how to cook it?”
“I hope so,” I reply.
“Don’t hurt yourself,” she warns, handing it back to me.

NOPALES SALAD WITH JALAPENO DRESSING

INGREDIENTS

2 jalapeños, stemmed, seeded and chopped (I couldn’t find any, so I used three Serrano chiles)
½ cup sour cream
1/3 cup cilantro leaves, coarsely chopped
1 tablespoon fresh lime juice
Pinch ground cumin
Salt
4 medium nopales (prickly pear cactus)
1 tomatillo, husked and cored
1 small red onion, peeled and diced
½ red bell pepper, cored, seeded, and diced
1 ripe avocado

DIRECTIONS

Puree jalapeños, sour cream, ¼ cup of the cilantro, lime juice, and cumin in a food processor until very smooth. Transfer to a bowl, season to taste with salt, cover, and chill.

Place each cactus base on a work surface, hold base with kitchen towel, and shave off thorny bumps on each side (and edges) with sharp knife. Blanch cactus and tomatillo in a large pot of boiling salted water over high heat. Remove tomatillo when tender, about 5 minutes, and transfer to plate. Cook cactus until tender, about 5 minutes more, rinse in cold water, and transfer to plate. Cut cactus crosswise into ½-inch wide strips and return to pot and let cook for 2-3 minutes more to remove excess slime. Drain cactus, rinse in cold water, and dry with paper towels. Transfer to bowl. Dice tomatillo and add to bowl. Add onions and peppers, season to taste with salt, cover, and refrigerate.

To serve, halve avocado, discard pit and skin, and thinly slice lengthwise. Toss together avocado, cactus mixture, and dressing in a serving bowl. Garnish with remaining cilantro.


It was a delicious empanada feast. Hats off to all contributors!

Weekend Spring Blogging!!!

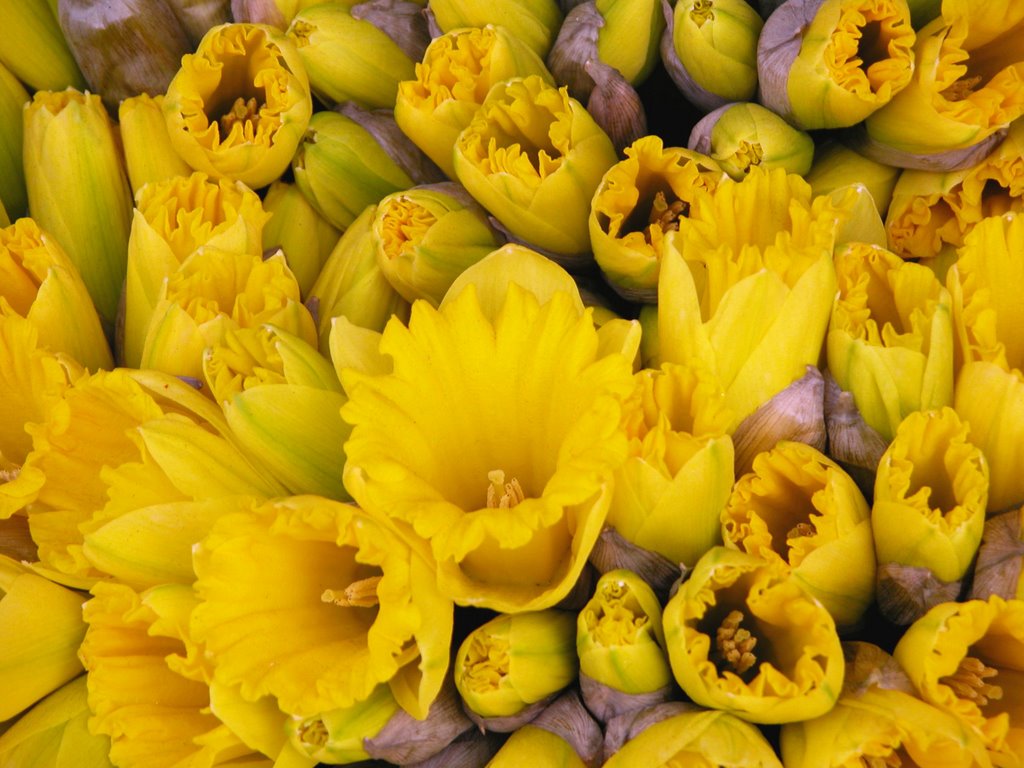
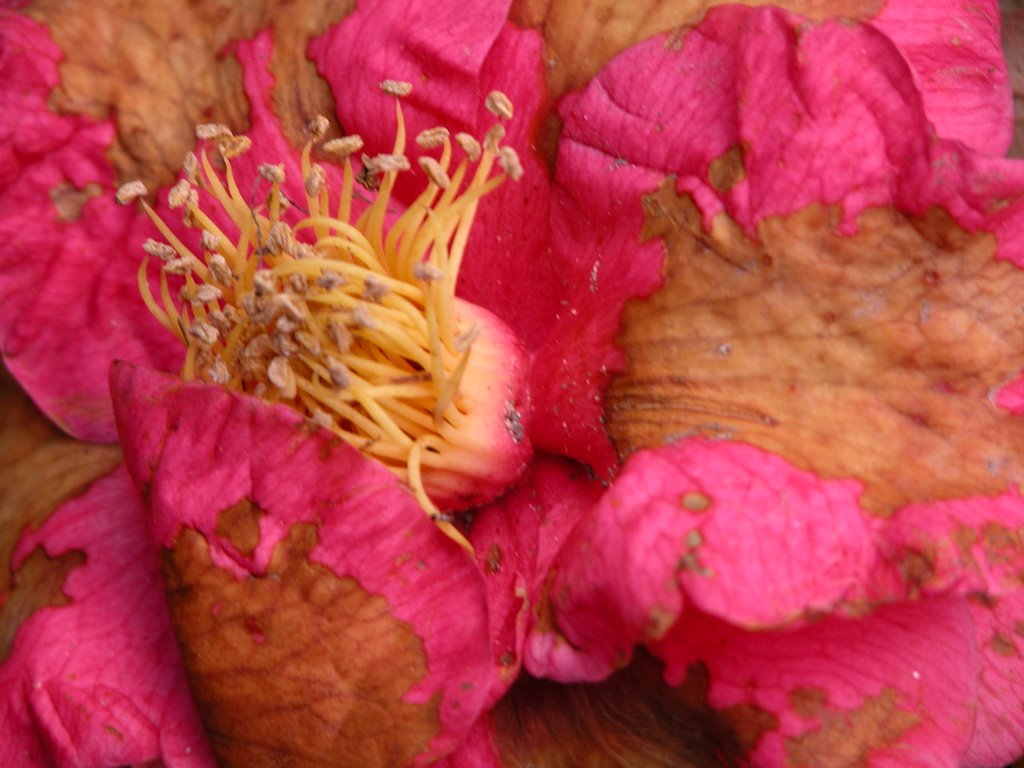
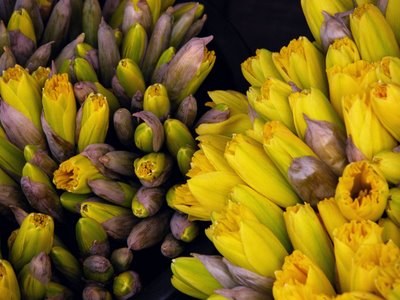
I try not to get too excited because I know that, in all likelihood, we still have a couple of weeks of cold weather in store...but even i can't help noticing the obvious...spring is almost here!


This mourning dove couple has commandeered my "birdfeeder" - I would mind, because they keep all the little birds from coming, but they also keep the pigeons away. I hear them scrabbling around and fighting on top of my air conditioner. The two of them are always together; they have only one competitor:


...Sir Jay of the Awful Squawk.


Wednesday, March 22, 2006

Making Gnocchi


Ladies and gentlemen, I have just completed my first homemade gnocchi.

Gnocchi, which are usually listed with the pastas on an Italian menu, have a dissimilar preparation to pasta and different ingredients. There are many varieties of gnocchi—spinach, semolina, ricotta, yam—but the standard is gnocchi di patate (potato gnocchi).

Gnocchi comes pre-made in frozen packages, which are totally good…so why did I bother to make my own and undergo that notoriously hard process, you ask? Three reasons:

1) So I could brag about it;
2) Because I’m a sucker for things-from-scratch;
3) Because one time about two years ago I went to try and get a waitressing job at my favorite Italian restaurant (I Coppi), and the smackdown was laid upon me by the manager/owner/chef, who assailed me with a quiz about homemade Italian food.

(Italian accent) “What is the difference between pancetta and prosciutto?”
“Um…pancetta is thicker cut? Cured differently?”
“What is polenta?”
(Now, think about it—how would you answer this question?) “Um, uh…it’s made from corn, it’s coarse-ground cornmeal…goes great with shrimp? It’s like grits, but better.”
“And how do you make gnocchi?”
“Oh…um…with potatoes?”

She seemed exasperated, but at the end of the interview she told me to come back on Thursday. I was so traumatized by the interview (I had just stopped by to pick up an application, after all) that I (embarrassingly) didn’t make it back.

But next time, I’ll be prepared.

It was pretty hard, but not as hard as expected, ultimately. The hard part would have been making the gnocchi look pretty (a step that I didn’t bother with, as it happened). They turned out deliciously, however!

HOMEMADE GNOCCHI WITH BROWN BUTTER AND SAGE

INGREDIENTS

2 lbs potatoes (I used a mixture of white and russet), peeled and sliced into similar-sized pieces
1 beaten egg
2 ¼ cups flour
1 teaspoon salt

4 tablespoons butter
2 tablespoons fresh sage, whole or chopped
Salt and pepper to taste
2 tablespoons grated provolone or fontina cheese
2 tablespoons freshly grated Parmesan cheese

DIRECTIONS

Boil potatoes until cooked; drain. Mash thoroughly or pas through potato ricer for smoothness. Transfer to bowl. Allow to cool.

Add the egg and mix thoroughly; add the flour and do the same, kneading as it becomes necessary. Always flour hands before kneading. Note: the more you knead, the more flour the recipe will require, and the more leaden the gnocchi will be.

Mix until you have a pliable ball of dough that is lighter than regular pasta dough but doesn’t stick to your floured hands.

Prepare a work area and dust it with flour.

Shape dough into lemon-sized balls and roll them out with your hands until you have rolls about 3/4 inch in diameter.

Cut the tubes of dough into pieces about one inch long (this is the part where it gets unpretty).

Using a deep pan or pot with a lot of bottom-surface-area (I ended up using a wok), bring about 3 inches of water to a simmer. In batches, carefully place gnocchi in the pan; try not to let them touch each other, or they’ll stick. Let boil about 3 minutes or until gnocchi float up; remove immediately to slotted spoon.

If you have to do several batches and can’t serve the gnocchi right away, coat the finished gnocchi in a little olive oil to keep from sticking together/drying out.

Once gnocchi are finished, melt better in large pan; cook over medium-low heat until browned but not smoking. Add sage and infuse 1 minute. Pour over cooked gnocchi; season with salt, pepper, and cheeses (be warned: too much cheese makes this dish taste dry).


In spite of messiness and lumpiness, this was super fun and I feel like a real Italian chef now. I’ll show you, I Coppi! Just wait!

Sunday, March 19, 2006

Seafood and Scrabble


We couldn’t tear ourselves away from the Super Scrabble board all afternoon, but I finally managed to get to the market yesterday, and was so hungry by the time I got there that when I couldn't decide between shrimp and tuna steaks, I got both. We came back and cooked between turns. Here's dinner:

SEARED SESAME-CRUSTED AHI TUNA

INGREDIENTS

1 large tuna steak, cut in half
1 ½ tablespoons white sesame seeds (get the Asian kind for added flavor and crunch)
1 ½ tablespoons black sesame seeds
1/4 teaspoon white pepper
1/4 teaspoon sea salt
1 teaspoon sesame oil
1 teaspoon canola oil

DIRECTIONS

Toss sesame seeds, salt and pepper together. Coat tuna in mixture on all sides.

Heat oils in pan over medium-high heat until hot but not smoking. Sear tuna 2 minutes on each side.

Remove from pan. Slice steaks into ½-inch thick medallions. Garnish with wasabi aioli and serve.

(On the Scrabble board: wontons, bandits, rarity)

WASABI AIOLI

INGREDIENTS

1 egg
1/8 cup rice wine vinegar
1/4 cup wasabi powder
Blended olive oil (25% canola oil, 75% olive oil) as needed

DIRECTIONS

In a medium mixing bowl, combine all ingredients except oil. Using an electric mixer, beat all ingredients on medium speed. Slowly add oil until mixture reaches desired consistency.

(In Scrabble, I make my third seven-letter word of the night: adopted)

SHRIMP, JICAMA, AND NOODLE STIR-FRY

INGREDIENTS
4 tablespoons peanut or stir-fry oil
1 small red onion, chopped
1 teaspoon fresh ginger, peeled and grated or minced
1/4 teaspoon dried hot red pepper flakes
3 garlic cloves, minced
6 fresh shiitake mushrooms, coarse stems removed. thinly sliced
1 small jícama (1 lb), peeled and cut into 2-inch-long julienne
3/4 cup frozen edamame, pre-shelled, thawed
1 tablespoon Asian sesame oil
1 lb medium shrimp, shelled
3 servings precooked yakisoba noodles
1/4 cup water
3 tablespoons soy sauce
1 tablespoon rice wine
2 scallions, chopped

DIRECTIONS

Prepare all ingredients (peel shrimp, chop onions, mince garlic and ginger, etc). Peel the jícama and julienne it. Munch accordingly.

Heat wok over high heat; swirl peanut oil to coat pan and heat until hot but not smoking (a drop of water should sizzle immediately in the pan). Sauté onions and ginger for three minutes; add garlic and pepper, 1 minute; mushrooms, edamame and jícama, 4 minutes. Transfer to a large bowl and set aside.

In the same pan, swirl the remaining teaspoon of peanut oil. Add shrimp and 1 tablespoon soy sauce. Sauté 3 minutes or until shrimp are uniformly pink (do not overcook or shrimp will be rubbery). Transfer shrimp to small bowl and set aside.

In same pan, add water, sesame oil, and yakisoba noodles. Sauté until noodles separate, adding up to 2 tablespoons water if necessary.

Return vegetables to pan with yakisoba; add remaining soy sauce and cook 1 minute. Add shrimp and cook 1 minute. Season with salt if desired. Transfer to plates, garnish with scallions and serve immediately.

(J gets 80-something points on the triple-word-score)

Comments:

I lovelovelovelove ahi tuna. It’s so easy, extremely quick, always good, and the steak was only five dollars at my beloved market. How can you beat that?

Wasabi aioli: For some reason, I decided that I could beat this by hand. I added the oil too soon, whisked my head off, ended up trying to do it in the blender, and it still didn’t thicken. From now on, I will always use a mixer. The flavor was still great, though, if the eggs don’t freak you out—and for you salmonellanoids out there, pasteurized eggs are available at most supermarkets.

Jícama – first time I ever cooked with it; coolest veggie EVER! If you’ve never had it, it’s a starchy, potato-sized root with a sweet, apple-like crunch. Like a potato-apple almost exactly, in fact. Most recipes call for it raw, if that gives you an idea—it’s often used in salads and slaws. I found, however, that it sautéed very well, and the crunch in the noodles was yummy—like water chestnuts, but slightly sweet and generally better.

Yakisoba—I’m not going to lie…I used a package. J had bought it and I was dubious, but they turned out great, and I appreciated less preparation. Go figure.


So that was our scrumptious feast last night. Super Scrabble (the same game) continues…right now I’m in the lead, 766 to 623. With twice as many tiles in the bag, I think it might be the longest game EVER.


(Linguini?)

Saturday, March 18, 2006

St. Patrick's Day Irish Soda Bread


My modest St. Patrick’s Day plans (which did not involve any of the swamped Irish pubs in the Lower East Side, I’ll point out) were to play Super Scrabble with J and cook an authentic Irish dinner: pan-fried sole, colcannon, tipsy pudding…or maybe just a delicious batch of fish and chips! But after double-featuring it at Angelica with “Tsotsi” and “Duck Season,” we found the market closed, and so revised our evening to homemade pesto pasta (appropriately green, at least) and the more deli-shopping-friendly Irish Soda Bread.

I searched online for a recipe and found about a million—some with honey, some with caraway, some with treacle, some white flour, some wheat flour, some with buttermilk, some with yogurt…I settled on the one that I had the most ingredients already in my kitchen for.

I’ll admit something embarrassing right now: I’ve never made bread before, really. I say embarrassing because it’s like growing some portion of your own food, or making some of your own clothes—one of those things that prove you could be independent from the world if you wanted to. So this, admittedly, was my first loaf of bread.

SAINT PATRICK’S DAY IRISH SODA BREAD

INGREDIENTS

¾ cup all-purpose flour
2 ¼ cups whole wheat flour
2 teaspoons baking powder
1 teaspoon baking soda
½ teaspoon salt
12 tablespoons cold unsalted butter, cut into small pieces
1 egg
½ cup honey
1 cup buttermilk

DIRECTIONS

Preheat oven to 350 degrees.

Lightly butter a heavy skillet, casserole, or glass pie dish, 10” in diameter and 2 to 3 inches deep.

Sift the flour, baking powder, soda and salt together.

Rub butter into flour with your hands, mixing thoroughly, until the mixture is coarse and even.

Beat the egg in another bowl until very frothy. Beat in honey; beat in buttermilk.

Gradually stir egg mixture into flour mixture. Flour hands and finish combining with gentle kneading, pinching seams together.

Shape into disc 2-3 inches thick and place in buttered pan.

Using a sharp knife, cut a cross ½-inch deep on top of disc.

Bake 45 minutes to 1 hour or until the middle is set. Cut in wedges and serve warm from the pan.

(Recipe adapted from Irish Abroad)


This bread was hearty, sweet, and completely delicious. We had bought some farm cheddar to have with it, but it ended up being better accompanied by a spread of honey butter.

HONEY BUTTER

INGREDIENTS

½ cup butter, softened to room temperature
¼ cup honey
*Pinch of salt, if using unsalted butter

Optional:
1 teaspoon cinnamon
¼ teaspoon vanilla extract

DIRECTIONS

In a small bowl, combine ingredients. Stir with wooden spoon until well blended.


Speaking of butter: there’s a lot of it in this recipe, which gave the bread a crumbly, scone-like texture…and it was great! But for something breadier, you might want to try a recipe with less butter.

Memory flashback while making this bread: When I was little, my mom and I made altar bread for the hippie Episcopalian church we attended (which, extremely weirdly, happened to be called St. Patrick’s). We had music on and my parakeet was chirping, and I had a box of butterfly cocoons that were just opening while we made the bread, which was sort of an unleavened version of this Irish Soda Bread recipe, full of whole grains and honey. We cut the crosses on top of the loaves and slid them in the warm oven.

Friday, March 17, 2006

Surprisingly Southern Culinary Delights


Sorry for my absence!

It’s Spring Break for us collegiate-types, and J and I took the opportunity to go South, where it’s 70 degrees, all the flowers are busting out, and family ties await.

We found amazing airfare on American Airlines and flew into Atlanta early Friday morning. Since our visit was a surprise, no one could, of course, pick us up at the airport, so we had to take my first-ever Atlanta taxi. Did you know that in Atlanta, the taxis smell like peaches and play classical music??!

The driver dropped us off at the end of my street so that we could sneak back up to the house and royally shock my mom. We clambered out of the car and were greeted with an odor that can only be described as funkalicious—the fetid fragrance of the Bradford pear tree blossoms. These trees are some of the first to bloom in Atlanta (they come before dogwood and azaleas), and their beautiful powder puff presences line highways and suburban neighborhoods…along with their grimace-worthy scent, the most courteous description of which is rotten eggs. There have been Bradford pears on my street since I was a kid (and lived on a street called Bransford, which afforded some confusion), and I’ll admit that I was glad to smell them—spring is at hand!

Mom was very surprised and (I hope) pleased to see us. Hugs and gifts were exchanged (she gave me the new Food Network cookbook—does anybody have favorite recipes from it?); then we piled in the car and went to Jalisco for lunch.

Ode to Jalisco

Thy crunchy tortilla chips fresh and hot;
Fajitas rich and juicy on my lip;
Your menu’s great, but nothing hits the spot
Quite like your chicken soup and your cheese dip.
O mystery concoction of white cheese!
With jalapeños spicy or without
I’d give limbs for those secret recipes
That melt away a dubious customer’s doubt!
I want to bathe in cheese dip! Chips (to scoop)
Will float around the edges of my tub;
The tender avocado in my soup
Will compliment the decadent cheese grub.
These, Jalisco, are my dreams of thee;
When I think of comfort food it’s you I see!

After lunch, we went to the grocery store and purchased ingredients for dinner, which J and I were preparing for the ‘rents. We got home, played Scrabble (at which we are fierce adversaries), lounged out in the garden in the sunshine, and started to prepare dinner, estimating my dad’s arrival from work at about 7:30. He, however, unaware of our visit, was busily mediating until past midnight…so we made the meal, ate it ourselves, and saved him a plate of leftovers. We went to bed, and mom passed off the dinner as her own attempt at a romantic dinner, which solicited profuse apologies from dad!

Here’s what we made:

APPLE, CURRANT, AND CARAWAY STUFFED CHICKEN BREASTS

INGREDIENTS

1 Granny Smith apple
3 tablespoons unsalted butter
1 teaspoon caraway seeds
1 medium onion, chopped
1½ celery ribs, sliced crosswise ⅛ inch thick
½ cup coarse fresh rye bread crumbs (with or without seeds)
¼ cup chopped fresh flat-leaf parsley
3 tablespoons dried currants
½ teaspoon salt
¼ teaspoon black pepper

6 skinless boneless chicken breasts (2 lbs)
1 ½ tablespoons vegetable oil
2 teaspoons all-purpose flour
1 cup unfiltered apple cider
1 cup chicken broth

DIRECTIONS

Peel and core apple and cut into ¼-inch cubes.

Melt butter in a 12-inch heavy skillet over moderately high heat until foam subsides, then sauté caraway seeds, stirring, 1 minute.

Add onion and sauté, stirring, until softened, about 6 minutes.

Add apple and celery and sauté, stirring occasionally, until crisp-tender, about 4 minutes.

Remove from heat and stir in remaining stuffing ingredients. Cool stuffing completely.

Preheat oven to 425°F.

Pat chicken dry and arrange, skinned sides down, on a work surface. Remove tender (fillet strip on side where breast bone was) from each breast half if attached and reserve for another use.
Beginning at center of thicker end of breast, insert a small knife horizontally, stopping about 1 inch from opposite end. Open incision with your fingers to create a 1-inch-wide pocket.

Pack one sixth of stuffing into each pocket. (You can stuff the chicken and chill one day ahead of time, if you need to.)

Pat chicken dry and season with salt.

Heat oil in a 12-inch heavy skillet over moderately high heat until hot but not smoking, then brown chicken in 2 batches, about 2 minutes on each side, transferring to a small roasting pan as browned (reserve skillet).

Roast chicken in middle of oven until just cooked through, 14 to 16 minutes.

While chicken is roasting, stir flour into fat remaining in skillet and cook roux over moderately low heat, stirring, 1 minute. Whisk in cider and broth and bring to a boil, whisking, then boil, whisking occasionally, until thickened and reduced to about 1 cup, about 8 minutes.

Let chicken stand 5 minutes, then cut each breast half diagonally into thirds or fourths. Add any juices from roasting pan and salt and pepper to taste to sauce and spoon over chicken.

(Recipe from Gourmet 2002, courtesy of Epicurious.com)

I’ve made this recipe several times, and it really is awesome. Caraway isn’t a flavor you find much these days, and this dish really brings it out in a complex way (offset by both the sweetness of the apple and the savory onions and rye). Overstuffing the breasts is unadvisable, because then they don’t stay closed and the medallions fall apart when you slice them. I’ve had the most success keeping the stuffed breasts intact by tying them up with a little kitchen string before searing and roasting. This dish is complimented perfectly by:

SICILIAN SPINACH SAUTE

INGREDIENTS

2 10-ounce packages ready-to-use spinach leaves
1/4 cup water
1 tablespoon olive oil
2 tablespoons chopped garlic
1/2 cup dried currants
3 tablespoons drained capers
1/2 cup coarsely grated Romano cheese

DIRECTIONS

Combine spinach and 1/4 cup water in heavy large pot over high heat. Toss until spinach wilts but is still bright green, about 3 minutes. Transfer spinach to colander; press to release excess liquid.

Heat oil in same pot over medium heat. Add garlic; stir until fragrant, about 30 seconds. Add currants and capers and stir 1 minute. Mix in spinach, then cheese and toss until heated through, about 1 minute. Season spinach to taste with salt and pepper and serve.

(Recipe from Bon Appetit 1998, courtesy of Epicurious.com)

A gold mine!!! I make sautéed spinach all the time—usually with either soy and sesame oil or red wine vinegar—and this is my new preferred alternative (although I left out the currants and threw in a tiny splash of red wine vinegar). The capers are a perfect addition.


WILD RICE WITH ALMONDS AND CURRANTS

INGREDIENTS

1 small onion, finely chopped
2 tablespoons olive oil
2 cups wild rice (12 oz)
3 cups chicken broth
Water
2 cloves garlic, minced
2 teaspoons unsalted butter
½ cup sliced almonds
½ cup currants
1 teaspoon salt
3 tablespoons flat-leaf parsley, chopped

DIRECTIONS

Sauté onion in oil in a heavy pot over medium heat until soft and golden, about five minutes. Add rice (rinse first, if desired) and stir until coated with oil and fragrant, 2-3 minutes. Add broth and however much additional water is needed according to package; stir in garlic, reduce heat and simmer until cooked, according to package.

While rice is cooking, sauté almonds and currants in butter until almonds are just browning, about 2 minutes. Set aside.

When rice is done, remove from heat, fluff, and gently mix in salt, almonds and currants, and parsley. Serve hot.

We love this rice and make it often. It’s also delicious with sweet maple flavors instead of garlic and stock.


My father was impressed by the meal, even in its microwaved form, which led to awkward re-distributing of compliments the next morning, when he found out who the real chefs were.

The rest of our visit with Mom and Dad included a trip to Fernbank and a wonderful meal at Six Feet Under, which is across from Oakland Cemetery. Oh, seafood steamer and oysters on the halfshell, thy names are “exquisite” and “delicious”! Next, J and I drove to Winston-Salem, NC, to visit his sister Angela, who attends NCSA. And on the way we dined at that emblem of Southernhood, that Mecca of calories…Waffle House.


Waffle House: a Photographic Essay


I busted out my high school algebra to figure out there are 129 combinations of ways to have your hashbrowns prepared (and that’s without doubles and triples!).


No pie in the pie stand today, but usually there’s nothing I wouldn’t give for a slice of Waffle House Chocolate Icebox Pie.


Once a Waffle House staff guy let me have his WaHo visor. Sweet.


Questionable bin in the parking lot:


Its contents: 400 gallons of grease.

I love you, Waffle House. However Yankee I may become, IHOP will never be thy superior.


Thursday, March 09, 2006

How to Make Authentic Miso Soup

Okay. You’re in college, you’re poor, and you recently read the back of the Ramen package and realized that there was a downside to 19-cent-a-pack, MSG-happy deliciousness. So you switch over to the powdered packets of instant miso soup…but they’re just not the same as the sushi bar kind (and dehydrated tofu is all kinds of nasty anyway). What do you do?

It turns out, as all miso lovers like myself will be happy to know, that making your own authentic miso soup at home is both easy and affordable. Here’s how:

MISO SOUP

INGREDIENTS

4-5 cups water
1 large strip konbu ($3.99 for a package of 12 strips) .333
1 handful bonito flakes ($3.49 for 10 individually-wrapped packages)
3-4 tablespoons miso paste ($4.99 for a tub that contains 25 servings)
½ block silken tofu, or as much as desired (1 block = $1.49)
½ teaspoons dried cut wakame ($2.99 for a 100g pack; 1 serving = 0.2g)
1 teaspoon (or ¾ inch) chopped scallions ($2.00 a pound, or 10 cents per stalk)


DIRECTIONS

There are two components to basic miso soup: dashi and miso paste. Dashi is a fish-and-seaweed broth made from konbu (a kind of kelp) and finely-shaved dried bonito flakes (bonito is a fish similar to tuna); it is a base for lots of Japanese sauces and soups. To make the dashi:

Add a strip of konbu to a pot of cold water (if the strip is too long, break it in half). Bring to a simmer over low heat; it should take 10-15 minutes for the water to simmer, allowing the konbu to infuse it.

As soon as the water reaches boiling, remove the konbu.


Add a handful of bonito flakes to the simmering water and remove from heat. Let the flakes steep for 1 minute, then strain them out of the broth.


Miso paste is made from fermented soybeans. There are many varieties of miso paste; they come in colors ranging from pale yellow, mild paste to strong, dark red-brown. Beginners often start with medium-brown paste, but I’m partial to lighter pastes myself (although these require more paste per serving than stronger pastes).


Scoop about ¼ cup dashi into a small bowl, then whisk miso in until a smooth, creamy paste is achieved. Whisk mixture into dashi and return to a simmer.


Add in tofu and wakame and simmer for 2 minutes. Garnish with scallions, a splash of soy sauce if desired, and serve hot.


Silken tofu is advised because its smooth consistency compliments the texture of the soup. Wakame is a kind of seaweed that is very high in iodine and is good for the metabolism, as well as being delicious. It rehydrates quickly in hot soup.

This is your basic recipe. But a variety of other ingredients can spice up miso:

Chinese cabbage, cut into bite-size squares or triangles
Cabbage, cut into bite-size squares or triangles
Lettuce, cut into bite-size squares or triangles
Green onions, sliced
Onions, sliced
Leeks, sliced or chopped
Okra, chopped
Butternut squash, thinly sliced
Snow pea pods
Green beans
Daikon, thinly sliced
Potatoes, thinly sliced
Sweet potatoes, thinly sliced
Mushrooms, sliced
Bean sprouts

Some of these need to be pre-cooked before adding to broth.

This whole process takes about 20 minutes, and that’s counting the 15 that the konbu has to steep! You can make the konbu-infused water in advance and keep it refrigerated for a good long time; the completed soup will keep for about 4 days.

So there you have it! Not only is this infinitely more delicious than ramen, but it’s extremely healthy as well! Ramen noodles, which contain an average of 14 grams of fat per package (the noodles are deep-fried before dehydrating) and 45-60% of your daily sodium, have very little redeeming nutritional value. Miso, on the other hand, contains about 3 grams of fat per serving, 8 or more grams of protein, negligible carbohydrates, and the amount of sodium is under your control. Additionally, konbu and wakame are both sea vegetables that are some of the richest sources of minerals in the world: they contain high amounts of calcium, magnesium, iron, iodine, bromine, vitamins A, B1, C and E; they also bind to heavy metal toxins and carry them out of the body.

According to these prices, one very large bowl of miso soup (serving two people easily) comes to $1.72. All my items were purchased at an East Village specialty-food store, though; if I had gone to Chinatown, I bet I could have gotten everything for at least a third less. So there it is—authentic, healthy Japanese food on a college budget.

Sunday, March 05, 2006

Tuscan Spaghetti with Red Wine


Another steal from Saveur/my "Recipes to Make" notebook. Threw it together in fifteen minutes today, and it was to die for. Didn't have a Chianti handy, so I used a bottle of Goats do Roam (reserving a glass for myself, of course), and it was just fine. Be sure not to rinse the pasta after it's done - the winey tang on the noodles is delicious! Also, the prosciutto is quite salty, so salting during the cooking process is unadvisable. The red pepper gives it a wonderful bite. The recipe is so easy, and great for an impromptu fancy sunday night dinner. Enjoy!

TUSCAN SPAGHETTI WITH RED WINE

INGREDIENTS

1 750-ml bottle Chianti or Chianti Classico
1 tablespoon kosher salt
3/4 pound (12 ounces) thin spaghetti or spaghettini, broken in half
2 tablespoons extra-virgin olive oil
2 cloves fresh garlic, minced
3 very thin slices (1 1/2 ounces) prosciutto, chopped (not too small)
1/4 teaspoon dried red pepper flakes
2 cups (about 3 ounces) fresh baby spinach
Freshly ground black pepper, to taste
1 tablespoon finely chopped flat-leaf parsley
2 tablespoons grated Parmigiano-Reggiano cheese

DIRECTIONS

Add Chianti, salt and enough water to fill a large pot and bring to a boil. Add spaghetti and stir. Cook until al dente, about 8 minutes, stirring frequently.

Meanwhile, in a large frying pan heat the olive oil over medium heat. Add garlic and cook for 1 minute. (If it starts to brown, lower heat.)

Add prosciutto or other ham and cook for another minute or two, until meat begins to sizzle. Add pepper flakes and cook a minute more. Toss in baby spinach and cook until totally wilted, about 2 minutes. Season with black pepper.

When spaghetti is done, remove about 3/4 cup of the cooking liquid from the pot and reserve. Drain pasta but do not rinse. Add spaghetti directly to frying pan along with 1/2 cup or so of the reserved cooking liquid, enough to make a sauce. Add chopped parsley. Toss pasta in pan to distribute ingredients and simmer a minute or 2 until cooking liquid has almost all evaporated. Sprinkle with Parmigiano-Reggiano cheese and serve immediately.


Tagged with: +

Guoba Xiefen Maodou (three times fast)

Confession: I love Saveur. Love it. Almost all the recipes in it are too complicated/too weird/too expensive for me, in all probability, to ever make; nonetheless, I dutifully read. The pictures are fabulous! Also, almost every issue features some little-known province of Scotland or Tuva or someplace where they eat turnip-stuffed tripe that miraculously looks delicious or cardamom hot chocolate made with goat’s milk (PS. I just made that up…but it sounds awesome!)…I lovingly cut out these recipes and their accompanying portraits and paste them in my “Recipes to Make” notebook.

I consulted this notebook this weekend, looking for something a little different. “Hmm…haven’t made anything Asian in awhile…what have I got in here that’s Asian? ...oooh…well, I have soybeans…great picture!...” And so it came to pass that I began to concoct (with J co-cheffing) Guoba Xiefen Maodou.

Now, I “might lose some of [my] readership with this one,” as my mother says. But hear me out. It’s a little bit weird, a little bit complicated, a little bit expensive…but making this was so fun!

GUOBA XIEFEN MAODOU (Crab and Soybean Stir-Fry over Sizzling Rice)

INGREDIENTS (straight from Saveur)

1 ½ cups short-grain white rice
5+ cups vegetable oil
6 oz. boneless Smithfield ham
½” piece ginger, peeled and minced
2 cloves garlic, peeled and minced
4 oz. shitake mushrooms, cleaned, stemmed, caps thinly sliced
Salt
2 cups frozen shelled fresh soybeans (edamame)
1 lb. lump crab meat, picked over
24 oz. silken tofu, drained and cut into 1” pieces
¾ cup dry vermouth
2 cups chicken stock
Freshly ground white pepper
¼- ½ tsp. cayenne
1 tbsp. cornstarch
1 scallion, trimmed and thinly sliced

DIRECTIONS (from Saveur via Me)

Let’s start with the sizzling rice (which was the most fun of all!). How do they make that crunchy, loud, wonderful stuff they put in your soup? Now you can find out…and make it yourself!

Following instructions on package or rice cooker, make 1 ½ cups white rice. Alternatively (do we see a recurring theme in Kate’s blog?), there’s always the old use-leftover-takeout-rice trick, or at least the go-get-it-at-Mini-Thai-rather-than-go-to-the-trouble-of-making-it-ourselves trick.

Once you’ve acquired cooked white rice, by hook or by cook (sorry, had to): preheat oven to 300 degrees. Grease a 10” x 13” sheet pan with a teaspoon of vegetable oil (or other oil, such as canola or peanut).Lightly oil your hands, then cover the bottom of prepared pan with rice, pressing it into a thin, even layer. Bake until top layer of the rice is dry, edges are slightly golden, and underneath is still a bit moist, about 50 minutes. Set aside at room temperature, uncovered, to let cool and dry until brittle, at least 3 hours or overnight. Break rice sheet into 1” to 2” pieces. (Small squares of prepared sizzling rice, prepared for deep-frying, can sometimes be found at Chinese markets.)


With me so far? This much you do in advance; the rest happens right at the end of the stir-frying process. At that point, heat oil in a heavy pot (the recipe suggest a medium one, but I used a very small one and worked in smaller batches…less oil required that way) and heat over medium heat until temperature registers 350 degrees on a candy thermometer (or, if you’re in college and don’t have one of those, until grains of the baked rice sizzle gently when dropped in). Working in batches, fry dried rice pieces in the hot oil, until rice is puffed but not golden, 20-30 seconds. Using a slotted spoon, transfer to a paper towel, then to large serving dish (or individual serving dishes, if desired).

For the stir fry (easy by comparison):

Put ham into a small pot, cover with cold water, and boil over medium heat for 15 minutes. Drain and let cool; chop into matchsticks. (I didn’t have any ham, so I used Canadian bacon, which certainly didn’t benefit the recipe any but was adequate.) Reserve a little for garnishing.

Put ginger, garlic, and ¼ cup oil in a wok or large nonstick skillet over high heat. When ginger and garlic start to sizzle (about 30 seconds), give them a stir, then add mushrooms and minced ham. Season to taste with salt and stir-fry for 1 minute.

Add soybeans and crab (we used fancy Captain's Catch canned crabmeat) and stir-fry until heated through, about 2 minutes.


Stir in tofu and vermouth and let boil for 5-6 minutes.


(Let it be known that I mistakenly got sweet vermouth instead of dry vermouth…it wasn’t a disaster, but definitely a choice—it lent a noticeable sweetness to the final dish. Also, be sure not to use tofu that’s tougher than silken—the tofu is supposed to mostly dissolve during cooking, and medium or hard tofu will leave you with sticky lumps. I used a little less tofu than the recipe recommended, and balanced out the thickness with a little extra cornstarch at the end.)

Add chicken stock and boil, stirring occasionally, until tofu dissolves into flecks (!) and thickens the sauce slightly, about 5 minutes. Season to taste with salt, pepper, and cayenne. Mix cornstarch with ¼ cup water and stir into wok. Return mixture to a boil, stirring as it thickens slightly.

Now you fry the rice; ladle stir-fry over finished rice, garnish with scallions and remaining ham and serve immediately.


Results:

Pretty good! Very authentic-tasting, not at all slimy (as some saucy seafood dishes tend to be), and the soybeans were awesome. Cayenne added a perfect kick. Would have been better with real ham and dry vermouth, but overall I think we did a great job.

Now I can check that one off in my Recipes to Make book!

Weekend Pie Blogging – Key Lime Pie


I'm scared to make my favorite foods.

What if I screw them up? Then I'll have to forever live with knowing that I can't make my own favorite foods. Or, worse yet, I'll have to try over and over until I get them right...thereby embarassing myself with/having to consume numerous inadequate versions of what ought to be perfection. With foods I don't care that much about, I try them once or twice and if they don't pan out, oh well! But the favorites...well, sometimes it's less scary to just refrain from potentially ruining the mystique.

Am I making sense?

I've never made lobster. I've never made gnocci. I've never made sushi, pear-and-gorgonzola ravioli, cinnamon rolls, baklava, or this particular warm goat cheese salad I have dreams about.

And, until yesterday, I'd never made Key Lime Pie.

The best Key Lime Pie I've ever had can be found in two places:
1) D&K's Beach Cafe in Grayton Beach, FL
2) 7A on 7th St. and Ave. A, New York, NY (open 24 hrs., a convenient half a block from my house. Their cuisine is nothing ot blog home about, but the pie is evidently supplied bi-weekly by an undisclosed neighbor from down the block.)

I'm a Key Lime Pie freak. I've tried all kinds before arriving at those two - the gelatinous kind, the green kind, the diner kind, the Persian lime kind, the faked-with-lemon-juice kind...

...but I've never made my own. I told myself that it was because key limes are hard to come across, especially north of the Mason-Dixon Line. So when I saw them at Whole Foods this weekend, I had no excuse. Weekend Pie Blogging coming up...limes right there on the shelf, so little and cute...

Key limes, also known as Mexican limes and West Indian Limes, are much smaller than regular limes (called Persian limes) and have higher acidity and a distinctive flavor. They're ping-pong-ball-sized, thin-skinned, and seedy. And now apparently available at Whole Foods. It took about 15 of them to make half a cup plus two tablespoons of juice (I imagine they're juicier in the summer, even if they are imported).

How to go about finding a good Key Lime Pie recipe? I'd had so many bad ones. Epicurious was no help - either they had some weird variation ("add almonds!") or the cooks bickered about the outcome ("not enough filling!" "too sweet!" "didn't firm up!"). I wondered and googled, googled and wondered, until I finally found the recipe of a good southerner who seemed to know his pie. I used the recipe from his site:

KEY LIME PIE

INGREDIENTS

1 1/4 cup graham cracker crumbs
1/4 cup sugar
1/3 cup butter, melted and cooled

4 large egg yolks
1 (14 oz.) can sweetened condensed milk
1/2 cup key lime juice

Whipped cream

DIRECTIONS

Mix together crumbs, sugar and butter; press into bottom and sides of 9" pie pan and bake at 375 degrees for 6 to 8 minutes. Place on rack to cool.

Beat egg yolks until thick and light yellow. Add sweetened condensed milk. Stir in half of the juice until blended. Add remaining juice and blend in. Pour mixture into pie shell. Bake at 350 degrees for 12 to 15 minutes until set.

Let cool to room temperature; chill and serve, garnished with whipped cream.


How did it turn out? The suspense is killing you...

...it was pretty good...but let it be known that mine is not the idealized slice featured at the beginning of the post (see below). I still haven't mastered graham cracker crusts...any tips? Mine always crumble when I slice the pie. It was very tart (no added sugar, plus the limes are out of season), but I like it that way, and the whipped cream offset it nicely. It wasn't rubbery at all - which is great, a key lime pie should be creamy, and creamy alone - but it wasn't quite light enough...a little dense and thick. Didn't fill up much of the crust; somewhat flat. Should I have beat the yolks with a mixer? What gives?


So all in all, it was pretty good - Jeremy insists that he likes it better than 7A - but not the slice of heaven I was hoping for.

Now, the challenge: I'm on the hunt for the BEST KEY LIME PIE RECIPE. Who's got it? Bring it on. I want to make your pie!!!

Mine was pretty good, but I'm not sure how to improve it. That said, I'm (*sigh*) ready to try it again. Suggestions?

Wednesday, March 01, 2006

Mardi Gras Low Country Boil


This morning on my way to class, I passed a lady on the sidewalk with a black smudge on her forehead—and I almost stopped to alert her to it when I saw several other people with smudges on their heads…and realized that it’s Ash Wednesday, the beginning of Lent.

I did have a Mardi Gras party last night, after all, so you’d think I’d have made the connection sooner. But I grew up Protestant, in an almost homogenously Protestant community, so…I forgot. What can you do?

Lent, or the Lenten season, is the forty-day period before Easter devoted to repentance, abstinence, denial, and soul-searching, and has been observed by some sect of Catholicism since at least 1500 AD. Many practitioners “give up” something during lent—candy, drinking, smoking; others vow to do things during Lent—exercise, practice frugality (note: Sundays are not counted in the forty, because Sundays commemorate the Resurrection. So usually it ends up being 47 days…which you should keep in mind if you’re giving up, say, chocolate).

Mardi Gras, or Fat Tuesday, is the night preceding the advent of Lent and is traditionally a last fling before the impending solemnity.

In mid-February, the ancient Romans observed the Lupercalia, a pagan festival that functioned as a purification and fertility rite. Many other offshoot pagan rituals evolved out of Lupercalia; all came at the end of winter and just before the first planting/spring solstice, and all celebrated fertility and good fortune for the coming year, as well as an abundant yield of crops. When Christianity was embraced by Rome, the Catholic Church attempted to make its receipt more palatable by merging some pagan rituals into Catholic ones (Easter also falls on the day of what was originally a pagan celebration of fertility and fruitfulness). Thus, In 494 AD, the Pope made the Purification of Mary an official holiday: If Christ was born on December 25, then He must have been conceived by the Holy Spirit in mid-March. Today, Mardi Gras is celebrated by the Church as a symbol of human overindulgence, to be reflected upon and repented for during the span of Lent.

Historically, it was customary for practitioners to fast during Lent in honor of its solemnity; many others abstained from eating meat. Carnivale, the Italian incarnation of Mardi Gras, literally means “leaving meat behind.” Therefore, it is customary not only to indulge in decadent sweets and drink on Mardi Gras, but also in meat.

Which brings me to the subject of this post: Low Country Boil.

Practiced by the French, Mardi Gras was brought to the New World via New Orleans, where it is, of course, still richly celebrated to this day. Famous for its melting-pot culture of French, Spanish, South American, Sierra Leonean, Senegalese, Gambian, Guinean, Liberian and Barbadian, New Orleans is home to mouth-wateringly unique Creole cuisine. Low Country Boil (which has a variety of aliases—crab/shrimp boil, St. Helena Stew, Frogmore Stew) perfectly embodies this blending of culinary traditions: Like various African cuisines, it’s a one-pot meal; it’s reminiscent of French stews; it’s rich with Spanish garlic, Caribbean allspice, African cayenne, and many other exotic herbs; it’s full of Louisianan shrimp (and crawfish, if you’re lucky enough to get your hands on some). Low Country Boil is often made on or before Mardi Gras, and is traditionally served poured out on newspaper on a table. It’s a wonderful mess and a festive social gathering unto itself.

Here’s my very own Low Country Boil recipe—a tremendous success last night! About 12 people partook, and I barely had leftovers (and I started with almost 15 pounds of food). Due to collegiate financial restrictions (as it was, I charged everybody $5 to cover some of the groceries and the stock pot I had to purchase), my boil is shrimp-only, but it’s great with crawfish and/or blue crabs.

LOW COUNTRY BOIL


INGREDIENTS

2.5 lbs. Andouille sausage (if sausage is purchased raw and not pre-smoked, fry sausage prior to boiling)
5 lbs. unpeeled raw shrimp
2 lbs. baby red potatoes
2 lbs. new white potatoes
2 lbs. baby blue potatoes
8 ears of two-color sweet corn
2 Lemons, sliced
2 tablespoons minced garlic

SEASONING:

2 tablespoons whole allspice
1 teaspoon whole cloves
2 tablespoons dill seeds
8 bay leaves
4 tablespoons yellow mustard seeds
3 tablespoons coriander seeds
1 tablespoon crushed red pepper

Salt, cayenne pepper, and/or liquid hot sauce to taste

DIRECTIONS

Mix seasoning ingredients together; place in a square of muslin or cheesecloth and tie securely with string. Feeling lazy? In some supermarkets, low country boil seasoning is available pre-made.

Boil water in a stock pot on stove or outdoor cooker. Heavily salt water; add juice of ½ lemon.

When water has come to a boil, add sachet, garlic and potatoes and cook for 10-12 minutes.

Add sausage, corn, return to a boil and cook for 2 additional minutes; check to make sure potatoes are tender, then add shrimp. Cook for 2-3 minutes or until shrimp turn pink.

Drain into a large colander; return to pot or simply pour onto papered table. Have cocktail sauce available.


The boil went over smashingly, and was accompanied by Greek Veggies (Courtesy of Mom)—also very well received—and followed by pound cake and King Cake, a New Orleans tradition supplied by Andrew. Thanks!


MOM'S GREEK VEGGIES


Layer, in order listed, in a glass baking pan:

sliced egg plant
sliced zucchini
sliced onion
sliced green, red, and yellow peppers (1/2 of each pepper)*
sliced fresh tomatoes
salt and pepper to taste
oregano
Freshly grated Parmesan cheese

Dot with butter and bake at 350 degrees for about 45 minutes or until tender.

*my variation. Mom uses only green peppers.